
This week, I was on a roll! I completely finished sewing all my individual squares! I was

super excited and with only a couple of hiccups between forgetting to put the foot down before sewing, forgetting to reverse stitch, and having my needle unthread…all super frustrating and tedious tasks but once I started going, I was in a rhythm and it was actually quite relaxing after my insane week of student-led conferences and planning. Once I finished my squares, I was very relieved and thinking, “I’m actually going to finish this blanket!”
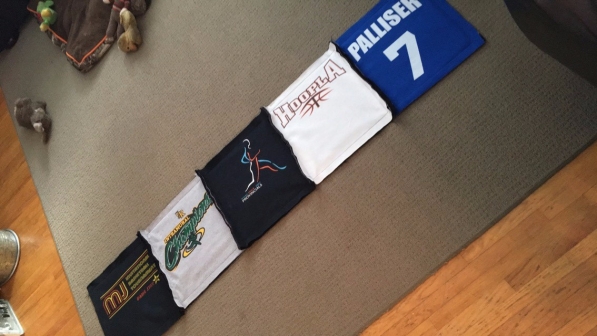
Then came the hard part…figuring out how to put all those squares together! I revisited a couple of my quilting blogs for some advice and guidance. I figured out that the  absolute easiest way to get things fitted together was to start by sewing my rows together, individually. This task was actually easier than I thought as I am creating a ruffle quilt. That means messy seams, and mistakes are allowed, and I don’t need to worry about being perfect. I laid out my row, and then took two shirts and placed them back to back to sew the seam. This way, the seam would be in the front of the shirts, and once I’m finished it SHOULD ruffle after I wash it a couple of times. My only concern is that my ruffles are too big. I think I want them smaller, but this also means I need to sit down and CUT (that dreaded word) all the shirt seams down. Right now, I have zero patience for that, so I will decide that later on. I continued, connecting the row of shirts together to get a product like this! I’m super happy with the way it looks right now!
Once my rows were connected (I should mention, I only did three), I needed assistance to figure out how to sew it together. Mom to the rescue! We sat down and thought through some options. This video also really helped us both visualize how it was going to work! The best one was to do essentially the same thing as I did with the rows, but I would need to skip the part where four shirts meet because I would lose my ruffle and the material is wayyyyy to thick to sew through. We began by folding two rows over back-to-back and sewed to the end of the first shirt, making sure to back-stitch as far as it would go, then pulling the shirt out, and starting on the other side, again making sure to get as far back as possible to avoid holes! I may need to go in an hand-stitch the corners but we will see how it holds up. Overall, it wasn’t as difficult as I thought but it was more difficult to sew straight seams as the farther I went, the more material I had, and the heavier the quilt got. All said and done, I finished and sewed three rows together! I’ll hopefully finish the rest up this week and I will have a finished quilt!!! 🙂


It sounds and looks like it is going to be a fairly hefty quilt. Looks cool – good job!
LikeLiked by 1 person
Great job Shelby! You’re quilt looks amazing, I can’t wait to see how far you get next week.
LikeLiked by 1 person
Congrats, girl! That will be such a nice keepsake when it’s all done. Do you think you’ll make another now that you have the first one almost done? I LOVE the sound of a nice thick, heavy quilt – so relaxing and soothing. Great job!
LikeLike
I’m not sure if I will make another one right away! My brother would like something similar so maybe it’s something I’ll work towards in the future. It’s definitely a skill I would like to keep up so I don’t forget how to do it once I’m finished.
LikeLike
YES!!! Congrats. It looks great. 🙂
LikeLike
Good job Shelby, it looks really great, Congrats.
LikeLike
Pingback: The Beginning of My New Sewing Career – The Secret Life Of a High School Teacher