Featured

The Beginning of My New Sewing Career

It all started with an idea, and a need to be able to sew.  I knew this skill would serve me later in life and come in handy, then I remembered a pin I made back in my early university days to make a t-shirt quilt and there it was: my brilliant idea for a learning project and I couldn’t have been more excited!!

IMG_1990

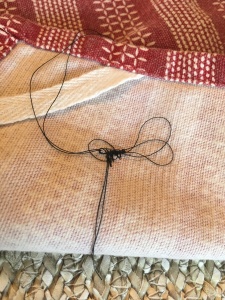
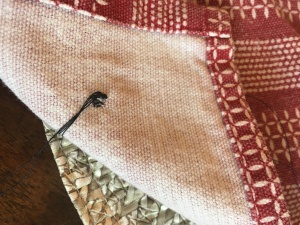
I started off by testing out my hand-sewing skills and after a few trial and errors and re-watching a couple of videos, I felt like I had the hang of it.  To begin, I know I was reliant on my mother for reassurance because as noted in other blogs, I am a slight perfectionist…I crave perfection and the idea that I can learn from making mistakes is absurd.  If I make mistakes often enough, I will quit.  It’s been my nature from a young age, and this project really challenged me to be okay with making mistakes, and learning from those mistakes.  Beginning with hand-sewing was a slow and confidence building technique I needed to start this massive project!  The great thing about hand-sewing was it was easy to fix mistakes and redo stitches.  I was able to do this quite a few times until I felt like I had gained a comfortable understanding of threading a needle, making a stitch, and sewing buttons.

IMG_2034Then came the real test.  I began my quilting process.  I did not expect there to be as many steps as there were and beginning on the sewing machine was terrifying and infuriating.  I know when I get frustrated, I need to step away.  The sewing machine was frustrating and annoying to figure out, but with some help from Youtube and my mother, I got the hang of the ancient machine.  What I don’t think I mentioned in my blogging was that I tapped into my school resources and borrowed a sewing machine from the school.  SO MUCH EASIER!!!  I am so grateful l did this, as I am confident my quilt would not have turned out as nicely and I would have ran into a lot more problems and would have needed to troubleshoot a lot more.

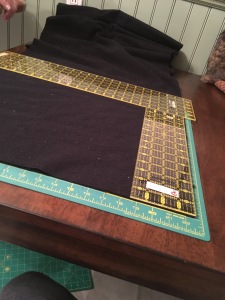
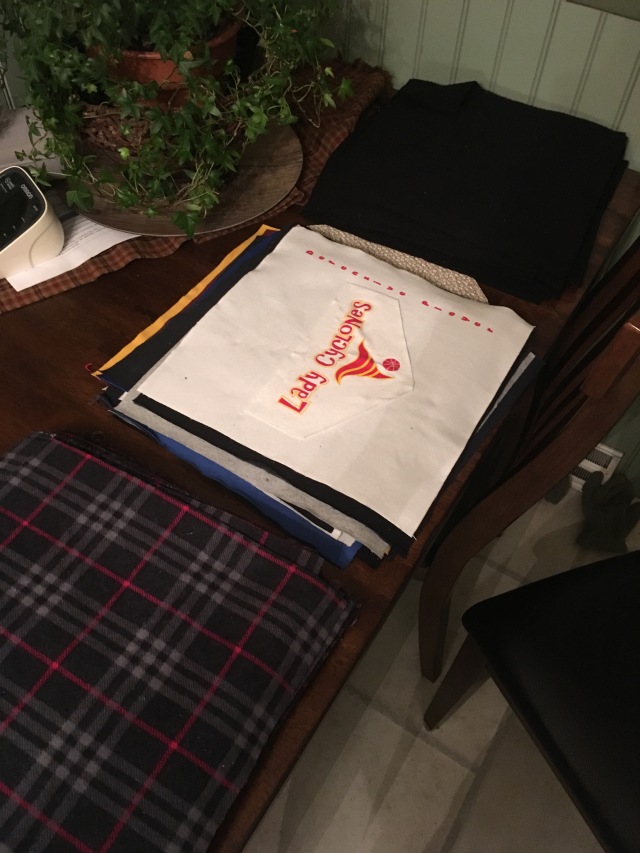
I had to select my shirts, and then cut them all, which was again super time-consuming.  It was at this point in the project that I was questioning my idea and questioning whether I would have enough time to finish.  I used my grandma’s tools and advice for cutting and interfacing the t-shirts.  In this, I also learned that I like to take a lot of different ideas for how to accomplish a task, and work it into something that makes sense to me.  I received advice from my grandma, ladies at the quilt shop, and the internet.  From these sources, I combined methods to complete my quilt in a way that made the most sense to me.  Having advice from so many sources could get confusing, but I also enjoyed having different options and ideas for how to complete this quilt successfully.

http_mashable.comwp-contentuploads201306Johnny-Depp-panics
GIF via Mashable

When I was cutting the t-shirts, I struggled at first with being perfect once again.  Knowing what I know now, the edges DO NOT MATTER!  I could have saved a lot of time as most of the edges end up as ruffles in my quilt.  I also would have sewed the interfacing on first and then cut!! Even when I did make mistakes cutting, I kept going and convinced myself that it would all work out in the end.  By the time I started cutting the flannel, I was set!  I persevered, and this is not something that I would normally do, but this project pushed me to just keep going and figure out how to fix the mistakes I made. 

IMG_2161Once the cutting was finished, I feared making mistakes on the sewing.  I pinned my flannel to my t-shirts, and I began sewing.  It wasn’t even that bad!  Again, I needed reassurance that I was doing okay and my mother was a great support to answer every call or she was there just to make sure.  This support and reassurance was key to my success because I probably would have struggled more or even questioned my methods has she not been there.  I found having a person to directly talk to, bounce ideas off of, and reassure my work an incredible resource and helpful for the success of the project.  It wasn’t a constant, “Am I doing this right?” but a gentle “good work” which is what everyone needs on occasion.

Once the individual squares were cut, the quilt flew together and I couldn’t have been happier with the way it turned out!  It was difficult to sew together because it was so thick but I now I have the coziest quilt to curl up with at night!

IMG_2208

I learned a lot about my learning style in this process.  I found out that this is not relaxing at all, and until I gain more experience, I will not find it relaxing.  The most stressful part of the project was thinking I would screw up and upon thinking more

Screen shot 2012-02-19 at 17.41.24
Lily’s Quilts

about it, I figured out why.  I was working with t-shirts, but not just any t-shirts.  These shirts hold a lot of meaning, and memories for me.  If I screwed up, the shirt and the memory was gone.  This was a high pressure project because it was SO meaningful for me.  I’m grateful I took the risk, but I feel that if I was using regular material, I would have been more relaxed with making mistakes and not as rigid.  I learned that I am an independent learner, and I enjoy things I can do on my own that give my brain a break from a stressful day of teaching, as well as challenge me in other ways.  It was nice to break routine, and make time to learn a new skill.  Overall, I really enjoyed this project and I learned a lot about sewing and about myself as a learner!

If you’d like to see the whole thing unfold, here is the link to my project! Until next time!  Thanks for stopping by!

Featured

I’m DONE Sewing!!

there-done-yay-2016-the-aukuard-yeti-doesnt-it-feel-10405833I finally finished!  Sewing that is…with the machine!  My quilt is all put together and I am so so happy with the results.  I ran into a few problems finishing it up, but nothing new.  Mostly, my needle kept unthreading and my lines weren’t lining up as I had to sew my rows back to back.  It was frustrating to see it not be perfect lines when I finished a row, and I need to remind myself that this is my first project, it’s a huge project, and I have room for error since my seams will be hidden by the extra material.

IMG_2209All said and done, I’m incredibly happy with the results and now I only have to complete it by hand stitching all the corners!  Because there is so much material in the corners of my t-shirts, I cannot sew over top so I have holes in the corners.  Not a bad thing, as I made sure to reverse stitch on either sides but if I accidentally put my toe or finger through the quilt, it could tear and I don’t want that!  I will need to hand stitch and knot the corners to make it stronger.  Then wash it three or four times and I will have a completely finished t-shirt rag quilt!!


I’ve learned so much throughout this project, especially about myself and what I need in order to learn.  I need time (chucks of it), and I need to do whatever it is in a way that makes sense logically to me, but I also need reassurance and quick feedback to make sure I’m actually on the right track.  I learn well on my own, and I learn by example.  It’s very interesting to me that I learn this way because I have always thought of myself as a “drill and practice” type of learner, so to find out that I actually am also a “visual” learner adds a cool dynamic to my learning style.  Did you guys learn anything interesting about yourselves during this process?  I find I learn completely differently/more dynamically now, but more to come about that next post!

Featured

I Can See The Finish Line!

This week, I was on a roll!  I completely finished sewing all my individual squares!  I was

23757865fe741ab17f74f046b948378c
Via Giphy

super excited and with only a couple of hiccups between forgetting to put the foot down before sewing, forgetting to reverse stitch, and having my needle unthread…all super frustrating and tedious tasks but once I started going, I was in a rhythm and it was actually quite relaxing after my insane week of student-led conferences and planning.  Once I finished my squares, I was very relieved and thinking, “I’m actually going to finish this blanket!”

Then came the hard part…figuring out how to put all those squares together!  I revisited a couple of my quilting blogs for some advice and guidance.  I figured out that the IMG_2190absolute easiest way to get things fitted together was to start by sewing my rows together, individually.  This task was actually easier than I thought as I am creating a ruffle quilt.  That means messy seams, and mistakes are allowed, and I don’t need to worry about being perfect.  I laid out my row, and then took two shirts and placed them back to back to sew the seam.  This way, the seam would be in the front of the shirts, and once  I’m finished it SHOULD ruffle after I wash it a couple of times.  My only concern is that my ruffles are too big.  I think I want them smaller, but this also means I need to sit down and CUT (that dreaded word) all the shirt seams down.  Right now, I have zero patience for that, so I will decide that later on.  I continued, connecting the row of shirts together to get a product like this!  I’m super happy with the way it looks right now!

IMG_2191
My first row done!!

Once my rows were connected (I should mention, I only did three), I needed assistance to figure out how to sew it together.  Mom to the rescue!  We sat down and thought through some options.  This video also really helped us both visualize how it was going to work! The best one was to do essentially the same thing as I did with the rows, but I would need to skip the part where four shirts meet because I would lose my ruffle and the material is wayyyyy to thick to sew through.  We began by folding two rows over back-to-back and sewed to the end of the first shirt, making sure to back-stitch as far as it would go, then pulling the shirt out, and starting on the other side, again making sure to get as far back as possible to avoid holes!  I may need to go in an hand-stitch the corners but we will see how it holds up.  Overall, it wasn’t as difficult as I thought but it was more difficult to sew straight seams as the farther I went, the more material I had, and the heavier the quilt got.  All said and done, I finished and sewed three rows together!  I’ll hopefully finish the rest up this week and I will have a finished quilt!!! 🙂

IMG_2194
HALFWAY!!!
Featured

And the Sewing Begins!

I DID IT!  I started sewing!  To say I was nervous was an understatement but I persevered!  I began by winding my bobbin again with black thread, and then threading the machine.  This was much easier than the last time I did it and needed no assistance via videos!  I was proud (proof I’ve actually learned something in this)!  After finishing the cutting stage, I needed to pin all my shirts and material together – shirt, black flannel, plaid flannel.  The goal was to purposely mismatch the flannel pieces so that it doesn’t HAVE to be perfect when I sew it together.  If it is purposely mismatched, then less mistakes can be made!

IMG_2161
I finished cutting.  Now I had to pin!  Thank goodness, my mom showed up to help!!

However, as I began the sewing process, it began clear that it didn’t matter if I tried to mismatch them or not, the plaid is square and it matches anyways.  Just the colours of the lines don’t line up and I am fine with that!  I think it creates character, and I really did not feel like attempting to line up the plaid in a way that matched on the whole quilt.  That would take much too much patience, planning, and perfectionism for this girl!

IMG_2164
After sewing together 3 rows of squares and realizing the pattern on the back with almost always line up despite my effort to have them not line up…

So on I went, pinning my squares together.  After a couple, my mother showed up to assist me in the process and to hang out with me while I sewed.  She is just as interested in this project as I am at this point.  My mom helped me pin the shirts to the flannel and after a while, we fell into a pattern of her pinning the shirts together, while I sewed the squares.  I am actually impressed with how easily I managed this week.  I watched this video for a refresher on using the sewing machine and to help me sew the corners, and then I was set!  I have used a sewing machine before, so I understood how the whole thing works, so I just needed a little reminder on the basics.  I knew I needed to create 1-inch seams (as decided previously) around my shirts, so I had a lot of room for error.  It was nice to have that reassurance, and after the first couple of shirts, I was rolling.  Sewing, pulling out pins as I went, lifting the foot, making sure the needle stayed in, turning my material, and continuing to sew.  My lines were even straight thanks to my painter’s tape I had placed on the machine to keep me in line!

I managed to get through three rows of shirts rather quickly, thanks to my mom’s help of IMG_2167
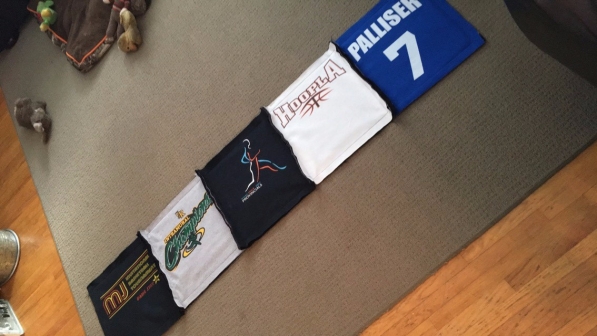
pinning the shirts!  I hope to finish the other three rows this week and then begin the real task of sewing it all together!!  I’ll have to check out some resources for how to sew the seams together, without going over the ruffles I’ve created.  I might also have to trim the edges of my squares…I don’t know if I want 1-inch ruffles all the way along the quilt yet or not, so that will be this week’s task!

What do you think?  Should I keep 1-inch ruffles or downsize?  Keep in mind, this means more cutting for me…


Featured

And I thought I was done cutting…

I’m back from Fabricland and sadly, it was more disappointing than anticipated.  First of all, I walked into the huge store expecting to find a plethora of flannel fabric, to which I found only a couple of racks.  I was disappointed in the variety, and I really didn’t find anything I really liked.  Luckily, I had gone to Quilter’s Haven in Moose Jaw first, just to check out the patterns there, and to my surprise, there were more that I liked there!  But since I am 1) a woman and insist on window shopping everywhere before purchasing, and 2) because I was already planning a trip to Regina, I decided I would test my luck at Fabricland before settling on the beautiful pink and grey plaid I found at Quilter’s Haven.  I also needed to find another colour of flannel to go in between my t-shirt and the backing, to which I settled on black.  (I’d also like to point out that the prices in Moose Jaw were cheaper!)

tenor (2)
Via Tenor

So now that I have my t-shirt squares cut and interfaced, and the flannel bought, it was time begin the real fun!  The kind lady who helped me in the store, helped me measure out how much I would need and gave me instructions to wash the flannel pieces first separately as I had two different colours.  Then I had to dry them and check the dryer every 15 minutes or so because there would be so much lint in the lint catcher as well as the dryer.  She was not wrong.  So washed and dried, I was ready to start sewing — except I decided in my last blog post, I would be sewing one t-shirt to my two pieces of flannel IMG_2149first, then sew all of my squares together to make my quilt.  I followed this blog for some guidance on sewing it all together.  I like the idea of making an X on the squares, but I’m not sure if I want that pattern across my t-shirts.  However, it was nice to see a visual of how to sew the rows and squares together.  This method also means I had to measure and cut all my flannel squares now, before starting to sew.  This is where, once again, I realized this is a bigger project than I anticipated.  So a night of cutting 30 black squares and 30 plaid squares began.  I started with strips and then cut those strips into squares making two at a time so it really only took a couple of hours although, tedious.  I’m not sure who said quilting was relaxing, but this is not my idea of relaxing…

giphy (1)
How I feel about cutting more squares…

But now, I am officially READY to start sewing!  I must say, I am a little nervous to make those first few stitches as Marley was to make those first few cuts.  I don’t want to screw it up and I don’t have any extra material or t-shirts, if I do screw up.  I know once I get started, I will be good to go, but it’s the first square that will be terrifying.  Here’s to hoping my sewing machine is forgiving and I’m not a total disaster!IMG_2153

Featured

From Beginner to Intermediate

IMG_1990My project is currently at a stand still until I can get to Regina next weekend for some fabric.  I could have had someone run to Fabricland for me, but I wanted the experience of picking my own fabric and making sure I liked the colour or if there were more colours to choose from.  So, it is perfect that Alec asked us to reflect on our learning projects this week.  So far, I feel that I have learned a lot of new skills when it comes to sewing.  My knowledge in the beginning was incredibly limited.  I barely even knew how to hand stitch something like a button!  I now have the skills to fix my cat’s toys, sew buttons back on to clothing, as well as patch a few holes.  My confidence might not be incredible, but it’s better than it was.  I think a lot of my confidence came from having a person there for immediate support if needed.  I could do most of the hand-stitching on my own, but knowing that I had an inspector there for immediate feedback was a nice support.  I think of Ryan, and his struggle with crocheting – sewing and crocheting from scratch, with little to no experience would be incredibly difficult to learn on your own without anyone to show you the skills needed.  Of course there are plenty of online supports, but having a teacher there in person is very reassuring and helpful, even if you don’t have a lot of questions.

tenor (1).gif


When I turned to the sewing machine, things got a little tricky, but I have from some great resources to help me along the way to creating my quilt – I was also recently told that “blanket” is a swear word in the quilting world, so I will now refrain from using it as I am apparently making a quilt, not a blanket.  My sewing machine has proofed to be quite finicky so I have opted to use one from my school.  The clothing and sewing teacher at Central has kindly offered me an extra sewing machine to aid me in my sewing adventures.  I think it’s a good call as my grandmother’s is quite old.  A newer machine might be a smarter move right now for my first official project.

IMG_2094My next move is to start sewing the flannel onto my t-shirt squares.  This needs to be done individually, and then I sew the t-shirts in rows, and then sew the rows together.  As I am beginning the stages of actually sewing, I am extra grateful that I do not have to follow a sewing pattern like Marley!  She is brave!! And then once the squares are all sewn together, there will be another stage of sewing which involves sewing the entire back piece onto the quilt.  There are actually two options for this: cut the backing for my quilt into squares and individually sew the back flannel on so that I have a square pattern on both sides of my quilt OR sew an entire back piece onto the outside edges of my quilt and then hand sew stitches into each corner of the t-shirts.  There are 30 t-shirts, and 4 corners per t-shirt.  This method is going to prove to be very time-consuming and profanity inducing I’m sure, so I am leaning towards the first method.  If there are any quilters out there, let me know which method you think would be best!

I feel like I am on track for finishing my quilt before the end of the course.  I know this is not mandatory as we are supposed to be learning a skill, but I know myself, and I know that as my year gets busier with the start of basketball season, I will be less inclined to work on this project, if I do not have the external motivation from my fellow ECI 831 members, so my plan is to have a final product by the end of the course.

Just Keep Cutting

IMG_2089Picture a rainy Saturday afternoon; most people would like to be curled up on the couch, watching movies, relaxing, reading a book, but not I!  I spent the entirety of my Saturday  cutting t-shirts and interfacing, ironing interfacing onto shirts and then cutting said shirts into 16×16 inch squares.  This process was incredibly draining, tedious, and frustrating.  I must say that although incredibly time-consuming, once a rhythm was established, it became a much easier task.  I will also admit that I definitely enlisted some help this time around as the task would have taken probably double if I have stubbornly admitted to tackling the task all by myself.  My mom came to the rescue, helping me iron the

IMG_2090
My  Little Helper

interfacing, while I sat and cut the shirts into the appropriate sizes.  It was actually enjoyable with her help as I got to catch up with my mom and be productive at the same time.  She was very helpful, and I would honestly has been a great resource up to this point!  It’s been a rather smooth process.

Once I finished cutting out all 30 shirts, I began the real fun part!  Organizing and laying out my pieces.  I was so excited to finally have an image in my head of what it will look like as a finished product!  I laid them all out and then began moving the squares around until I finally settled on my placement.  I may still change a couple of pieces but overall, I like it!  What do you guys think??  Any suggestions!?  My goal was to spread out the brighter coloured ones as well as make sure I had at least one white, black and grey one in a row or in an area so it doesn’t look too dark.

IMG_2094

In the process, I ended up kicking out a couple of shirts and replacing them with shirts I either forgot to cut and really wanted on the quilt, or one shirt that is very awkward to cut, so alas I will need to cut and iron three more shirts! I will end up actually cutting it at the side (under the arm) of the shirt, and placing a patch of the front of the shirt in the middle of the square.

My next task will be buying the flannel of choice for the squares and the backing!  I will probably need to make a trip to Regina to buy the flannel as Moose Jaw only has one store, Quilter’s Haven and I’m not sure on the amount of options they will carry and I will not have time to order some online.  Fabricland perhaps?  Does anyone know any other places to buy fabric in Regina?

It’s All Fun and Games Until You Start Cutting…

IMG_2046
Some shirts laid out for my blanket design!

This week was not what I anticipated.  I was going to FINALLY start my real project- the blanket.  However, things did not go how I planned and this is the first time I questioned both my sanity and ambition for starting this HUGE project!  Cutting.  Not as easy or straight forward as I thought.  I’ve had a lifetime of practicing cutting paper and really, how hard could measuring and cutting out a few t-shirts be?  HARD. REAL HARD.  Mostly it’s the process that’s difficult  It’s time consuming, tedious, and requires a lot of patience which as previously stated, I do not have much of.

My week consisted of some more research as to what step to really take next which all began after a conversation with my grandma at Thanksgiving dinner. She told me I could borrow her tools for my little adventure which I was grateful for, but then I got confused.  Don’t I have scissors?  What else do I need?  Turns out, a lot!  A lot included a very fancy cutter called a rotary cutter, measuring boards and this material called interfacing.

IMG_2063
The Materials (Courtesy  of Grandma)

Welp, to Google I go!  I had to do some research about this new information.  Turns out the rotary cutter would actually make life much easier as I am left-handed and struggle significantly with scissors.  It makes incredibly precise cuts and I realized I would need to cut to specific dimensions, which I chose as 14 inches by 14 inches for simplicity but also sizing.  Squares are nicer to work with, and the large squares both fit all my t-shirt designs and gives me more room for error (which at this point is very probable).  So the measuring boards were to be used to lay out the t-shirts and to cut on, and to make sure the rotary cutter had a straight line to follow!  Simple so far, but then there was this mysterious stuff called interfacing.  Apparently, it restricts stretching of material which is necessary for a t-shirt blanket as t-shirts are quite stretchy so this is supposed to make things easier for me. Supposed to being the key word.  You have to iron this stuff onto the back of the t-shirt before you can sew it all together.  So, I have to cut and iron on this interfacing to the middle of my design of my t-shirt without actually looking at the design.  Urg.

IMG_2066
The first cut is the hardest…

This was the beginning of a long night.  Cutting the interfacing was simple, (just 14″x14″ squares) but placing them in the middle of the design was much more difficult.  It took a lot of patience and meticulous placement.  Then came the actual cutting of the t-shirts of which there are 30…

The following two hours consisted of cutting the interfacing, ironing it onto the back of the shirt, measuring a perfect square on the front of the shirt, and then cutting the shirt out on the cutting board.  I got 8 shirts cut to my dismay.  The first one was shaky and not as straight as it should have been, and I also learned you can’t take shortcuts and cut more than one at a time…(see pictures below). I didn’t expect this part of the process to take such a long time, so I have a lot more cutting to do this week!  And then there is the placement of the shirts to do as well.  This process is going to take a lot longer than anticipated!!  More to come!


This slideshow requires JavaScript.


Tackling the Sewing Machine – Literally

IMG_2034After my confidence boosting experience involving hand-stitching last week, this week I decided to tackle the basics of the sewing machine.  After perusing the web for some starting points, I decided it would be best to find the actual manual, which I did.  I also found an ancient step-by-step for threading the machine.  Although it probably would have been helpful for someone who understood the terminology of the sewing world, I found it much less helpful.  I’m sure if I had had enough patience, I could have figured out how to do it with this diagram but as I am one of those millennials that have zero patience, I moved on to Youtube where I found an incredibly helpful video with what I deem “normal” language, a step-by-step demonstration and instructions, as well as it was in colour!

I watched the video twice, taking care to check out the similarities and differences of the machines.  I watched it a third time and paused often to complete the steps myself.  Step one was this foreign thing called “winding a bobbin.”  I confess I did not know what a bobbin was before this week.  Continuing to watch the video, I wound the bobbin successfully and here is the evidence.  I thought the process was cool so I decided to take a video of it.

After being mesmerized by the winding, I moved on to step two: threading the machine.  I continued to watch this video and pause when it got to far ahead, backtracking to re-watch certain steps.  I successfully did it!  As it was Thanksgiving, I had the assistance of my mother again.  I was quite proud of getting this far without her aid, and upon inspection she told me that I forgot to thread the actual needle in the machine.  Bummer.  So I sheepishly did that with only a little foul language and then with all her great knowledge, she said I was ready to practice some stitching.  As I began under her instructions of what to do, we found to her dismay the “tension” of the machine was off.  So I got to learn something new again!  This time, with my mother’s assistance.

I checked out some videos and a wikihow on adjusting tension and found out that it is essentially making sure the the thread is being pulled through the material evenly on both sides (meaning the needle and the bobbin).  If this doesn’t happen it looks uneven or like this:

aid192048-v4-900px-Adjust-the-Tension-on-a-Sewing-Machine-Step-4-Version-3
Image Via Wikihow

Together, I practiced stitching while we simultaneously adjusted several setting on the machine until the stitching looked the same on both sides.  This process involved rewinding the bobbin, re-threading the machine and then trying again.  I now understand why some people really don’t care for this tedious task.  This was a much more difficult process than I anticipated as there is no video or help online to find the “perfect tension.”  It is trial and error for your specific machine and material of choice because every machine is different, and each type of material needs a different tension.

giphy

However, once we did re-thread the machine with some newer thread, the product was much better!  I also got more practice at the dreaded threading of the machine so all was not lost.  The next steps are going to be selecting my t-shirts for my blanket, the material, sizing and layout.  I’m a perfectionist at heart so I am anticipating this will be more difficult than I think!

Hand Sewing for the Cat

IMG_2001
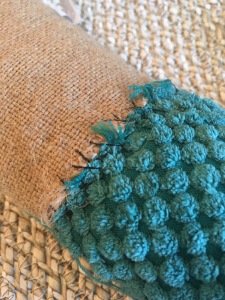
So this week for my learning project, I decided to start with the very basics.  I’m ignoring the sewing machine until I can learn to fend for myself with a needle and thread.  I’m going to be honest, I began this week not even knowing how to thread a needle.  However, I persevered and learned on my own; turns out, it really isn’t very difficult and my clumsy fingers were able to handle this minute task.
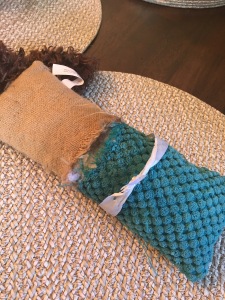
My cat, Jax, being the destroyer that he is had ripped a

IMG_1989
The attacked toy in question

seam in his toy and I could no longer allow him to play with it and tear out the stuffing to his dismay.  Originally, I thought, “I’ll take this to my mother and she can fix it!” but with my new task of learning to sew, I took it to her house and said “Mom!  I need a needle and thread and I’m going to fix this!”  I actually watched a video on threading a needle (yes, this is how armature I am) and then also watched a video on fixing a tear with hand sewing.  Both videos were very easy to follow and I am going make sure to check out Stitch My Style for other sewing videos.  She has a lot of cool projects that maybe once I am more versed in this sewing world I can tackle!

My mom was also a great resource as she helped to make sure I actually was completing the stitch properly and actually completing my mission of fixing this cat toy.  I had great success!!  Not the cleanest stitching exactly, but it will last until Jax decides to tear it apart and I can fix it again!

IMG_1993
Messy but Fixed!

Feeling incredibly confident in my new-found stitching, I decided I should try some button work.  I used thread, a needle, an old tea towel and button.  I watched a couple of videos (this one was the best) and had my mom’s assistance waiting on deck but I was successful again!  This may not be as hard as I originally thought!  However, my mother then informed me that the stitching on the back of the button should be neat.  This is what mine looked like….

IMG_1995
Trial 1

…so I cut the button off, and tried again.  This time trying to keep the button straight and my stitching neat and tidy.  This was the second result…

IMG_1997
Trial 2

So far, YouTube has been a great source of videos as I learn much better from following someone else then just reading directions.  My next task will be to tackle the sewing machine and learn the basics for threading the needle and perhaps even just turning it on!  I found a fantastic blog called The DIY Dreamer with a lot of links to other blogs and I think it will be very helpful with the sewing lingo as well as some basic sewing machine tips!  More to come; stay tuned!